Tom.TH_Lin's blog

sub


  • Home

  • Categories

  • About

  • Archives

  • Tags

Git 分支模組開發流程 A good Git model practice and some tips

Posted on 2016-02-23   |   In git , tips   |  

commit tree of a real project
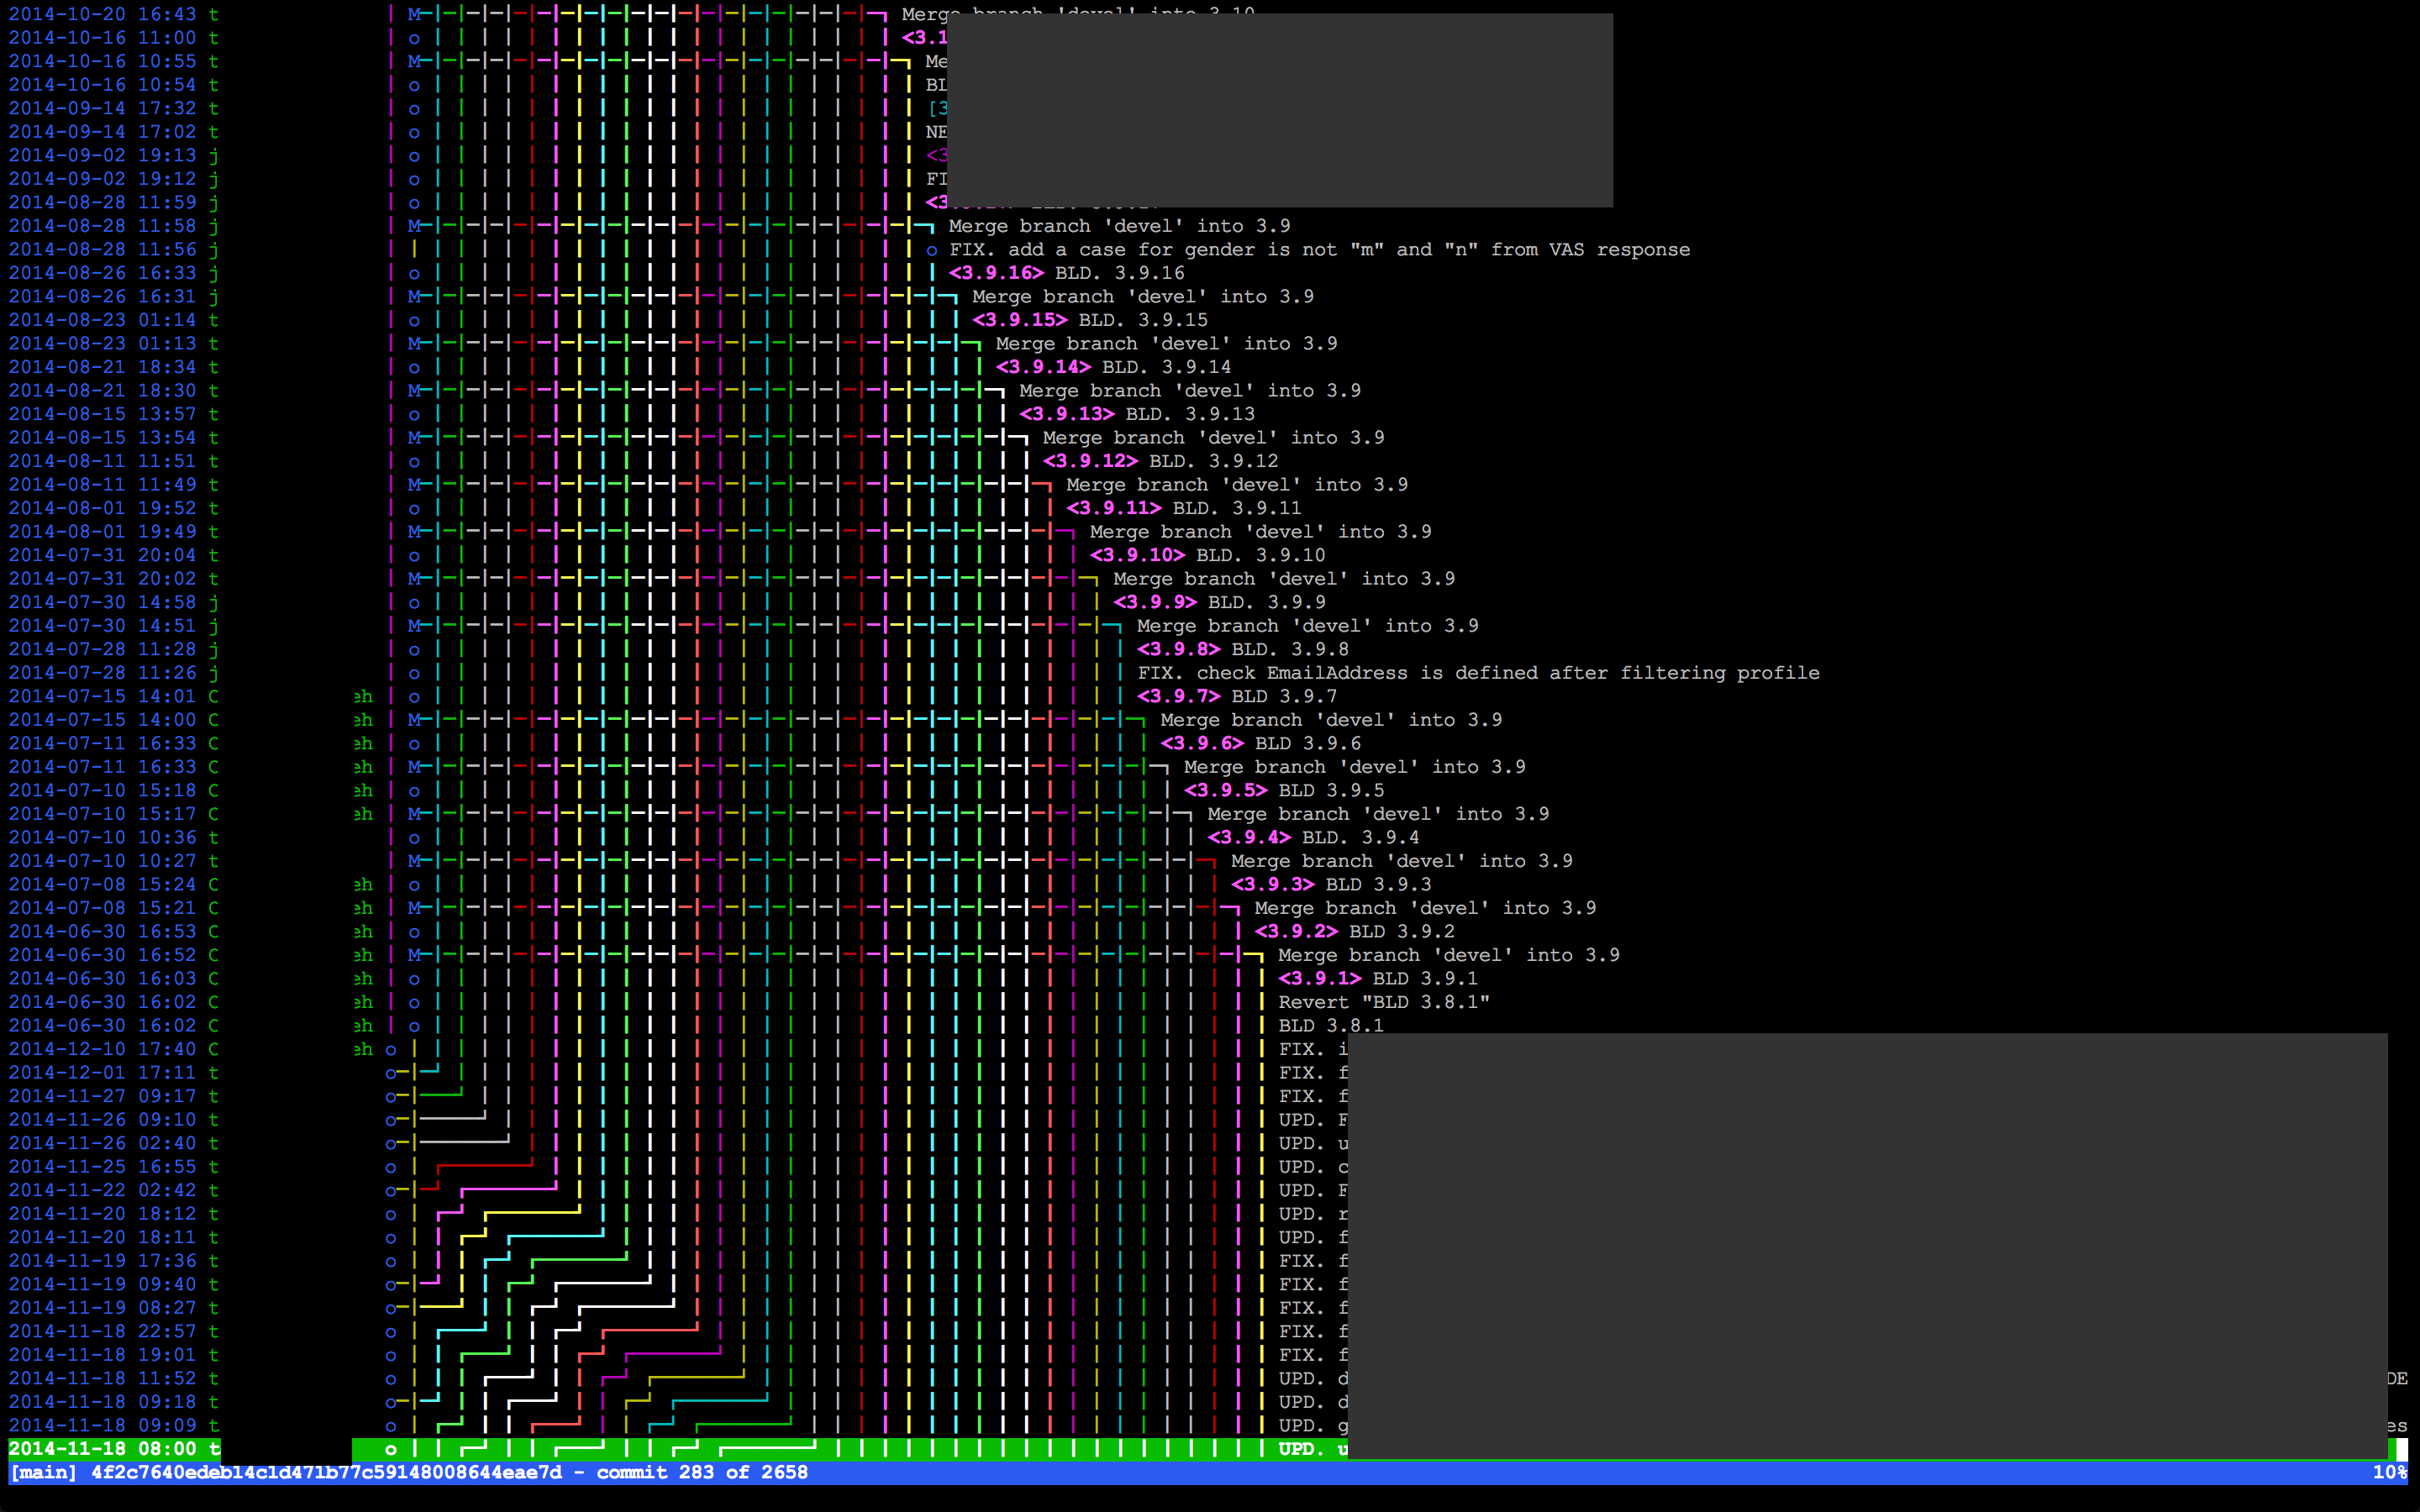
Crazy git tree
有時候如果沒有用適合的流程來使用Git,commit tree就會變成像上圖那樣讓人不易閱讀。

Git 分支模組開發流程

今天來跟大家介紹一下許多人在使用的Git branch開發最佳使用慣例,我現在工作上也是使用這種模式。下面的圖及內容都是參考 A successful Git branching model 這篇文章。
簡單來說,他將 branch 分成兩個主要分支(master, develop),三種支援性分支(Feature branches, Release branches, Hotfix branches):
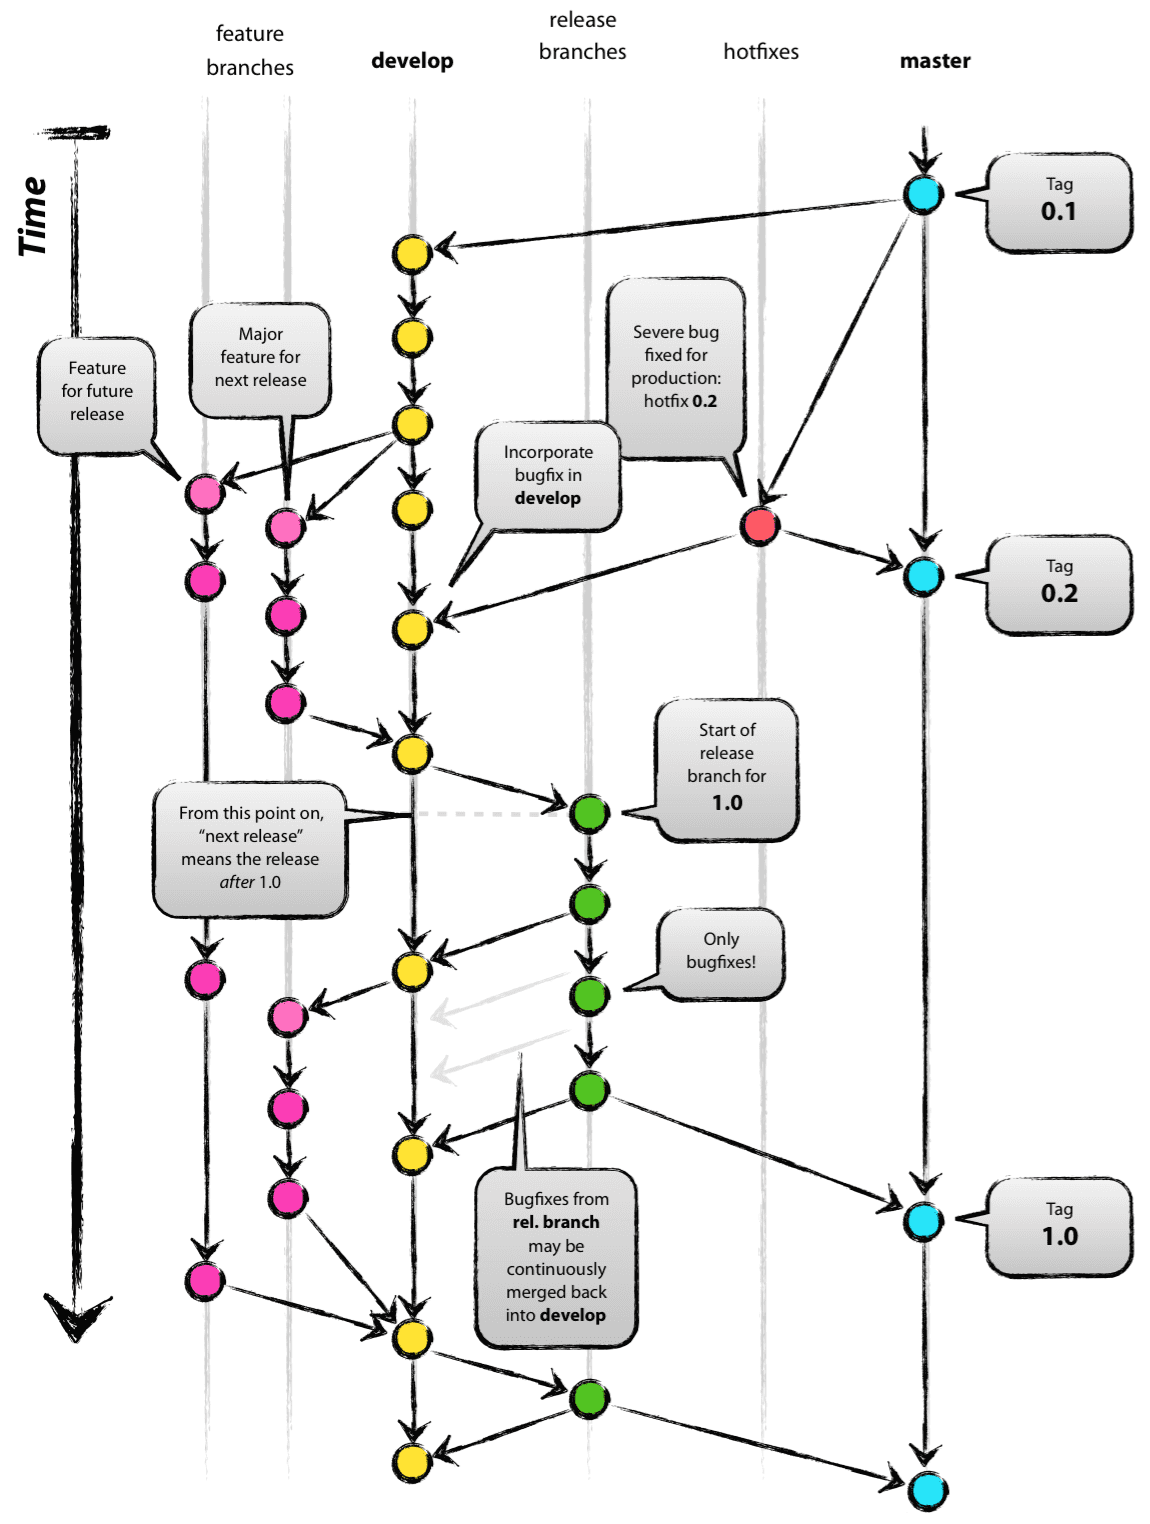
git-model

  • 主要分支 (The main branches)
    • master: 主程式分支, 永遠處在 production-ready 狀態
    • develop: 開發分支, 下次發布之前的開發最新進度
  • 支援性分支 (Supporting branches)
    • Feature branches: 開發新功能的分支, 從 develop 切出來, 功能開發完成再 merge 回 develop
    • Release branches: 準備要 release 的版本, 在這上面只修 bugs, 從 develop 切出來, merge 回 develop 跟 master
    • Hotfix branches: 有重大 bug 必須馬上修, 不能等到下次 release 版本才修時用的, 會從 master 分支出來,完成後 merge 回 master 和 develop
Read more »

SSH-Agent-Forwarding

Posted on 2015-12-14   |   In tips   |  

Using SSH agent forwarding

SSH agent forwarding allows you to use your local SSH keys instead of copy and paste your keys on your server. Means that you don’t have to worry about leaking you SSH Keys.
Take what I recently used for example, I was going to access the Server2 through Server1 from Local, but I don’t want to leave my SSH Key on Server1.

1
Local ---(SSH)---> Server1 ---(SSH)---> Server2

Setting up SSH agent forwarding

Let’s set up SSH to allow agent forwarding to your server.

  1. Using your favorite text editor to open the file at ~/.ssh/config. If it doesn’t exist, you can enter touch ~/.ssh/config in the terminal to create this file.

  2. Enter the following text into the file, replacing Server1 with your server’s domain name or IP :

    1
    2
    Host Server1
    ForwardAgent yes

Then you’re good to go!


SSH agent forwarding 的應用

SSH agent forwarding可以讓本地的SSH Key在遠端Server上轉送,就是說當你需要透過一台遠端Server連到另一台遠端Server的時候,你不需要將你的Public Key跟Private Key複製到遠端Server上,就可以省掉手動複製的麻煩,也不用擔心SSH key會外流。

Read more »

Nginx + PHP web server on docker.

Posted on 2015-12-04   |   In web server , nginx , docker   |  

Deploy a Nginx + PHP environment on Amazon EC2 using docker


簡介 Docker (What is Docker?)

Docker 是一個開源專案,支援多平台,從筆電到公、私有雲上能進行快速部署輕量、獨立的作業環境。
Docker is an open platform for distributed applications for developers and sysadmins.
Docker img

目的 (Content)

主要介紹如何用 Docker 在 AWS 上部署一個 nginx + php 的環境,會提到以下幾個部分:

  • 在 Amazon 的 EC2 上安裝 Docker
  • 註冊及登入 Docker Hub 帳號
  • 下載 docker image 來部署環境
  • 完成

Will focus on how to deploy an nginx + php environment using docker on amazon EC2:

  • install docker on Amazon EC2
  • Register and login to Docker Hub (Optional)
  • deploy using docker image
  • Done
    Read more »

Simple web server by Nginx + PHP-FPM

Posted on 2015-10-31   |   In web server , nginx   |  

Simple web server

I was making an web page at work recently, the main perpose is to integrate the API I wrote with a web page console. So I will need a web server for my site and do the test. After a quick search on google, I decided to use nginx and php-fpm to implement my server.
I installed it on an AWS-ec2 with Amazon Linux AMI instance.
最近工作上剛好在做一個網站,主要功能是要把我之前在寫的cloud messaging API用一個網頁主控台的方式接起來,讓不會使用command line指令的使用者也可以來使用我們API的功能。經過一番隨意的搜尋研究之後決定使用 Nginx + PHP-FPM 來實現一個可以跑php的網站伺服器。使用的server是裝在AWS的ec2機器Amazon Linux AMI上面。

Install Nginx and PHP-FPM

1
sudo yum install nginx php php-fpm

Completed! the installation was pretty easy, but the configuration was annoying.

Put your index.php and all web files to the default Nginx path:
把你的index.php跟其他網站檔案放到 Nginx 預設的路徑底下:

1
/usr/share/nginx/html/index.php

Configure Nginx

Nginx Configuration:
順利安裝完之後開始修改 Nginx Server 設定檔,如下:

Read more »

Shell Script to Get The Time Difference

Posted on 2015-10-27   |   In Shell Script   |  

Shell Script to Get The Time Difference

I was trying to estimate what is the time spent for a curl command.
So I made a simple shell script for this.

First
create a script name timediff.sh

1
$ vim timediff.sh

Second
Append text as follows:

1
2
3
4
5
6
7
8
9
10
11
12
13
14
#!/bin/bash
echo "==========START=========="
date
START=$(date +%s%3N) # %3N means in miliseconds
# Start your script work here
echo "processing..."
sleep 2 # sleep for 2 seconds.
# End
END=$(date +%s%3N)
echo
echo "==========END============"
date
DIFF=$(( $END - $START ))
echo "It took $DIFF ms."

Third
Save and execute the following script:

1
$ chmod +x timediff.sh

Finally
Execute the script:

1
$ ./timediff.sh

Output:

1
2
3
4
5
6
==========START==========
二 10月 27 09:32:50 UTC 2015
processing...
==========END==========
二 10月 27 09:32:52 UTC 2015
It took 2002 ms.

123
Tom.TH_Lin

Tom.TH_Lin

11 posts
12 categories
19 tags
LinkedIn GitHub
© 2015 - 2016 Tom.TH_Lin
Powered by Hexo
Theme - NexT.Mist